Showing posts with label New products. Show all posts

Thursday, 5 December 2013

It's getting closer!

It's hard to believe that in three weeks the big day will be here! It only seems like a couple of weeks  have gone by since summer!!
 
My piece for Clare Curd Crafts DT blog this week is a mixed media wall hanging, and with Christmas been so close I made it a little seasonal.
 
 
I used a piece of mount board as my base, and firstly covered it in tissue paper to get some good texture. This was then coated in a layer of gesso, and then lots of layers of acrylic paints. Some stamping was added and some bubble wrap-applied paint.
 
Then I added some areas of Flitter Glu and Mega Flakes in Royal Peacock

The small snowflakes and the robin are from the Winter Critters stamp set
 
 
My girl is paper pieced and then paint added to give some depth.


How cute is that robin

 
See you next week x


Friday, 4 October 2013

Birthday Basket

Happy Friday

Its Mel here again and this week I wanted to share another wee tutorial post, something simple that doesn't need lots of crafty materials things that wee all have in our stash


Doesn't it look rather pretty and filled with some sweet treats will make a great gift for that very Special person on their Birthday!

Now firstly You will need a piece of 12x12 card divided equally up in to nine 4x4 square


Next you want to make two pendant style triangles in the two middle square as below, I did this my measure 2 inches in to the middle on bottom edge then drawing to lines out to the centre. Once you have both sides done cut away the waste area


Next on the outer squares measure three panels at 1 1/2', 1 1/4', 1 1/4 inches as below


Do this on all the corners then cut down the lines and these will form the sides for the Birthday Basket


Then on the inner two panels you want to trim off a small tab, about 1/2 inch ( I use a ruler width )
You can see below


Next you want to decorate the outside of the basket, I used some of my American Crafts Shoreline papers and then used an red alcohol marker on all the edges!


Now comes the tricky part
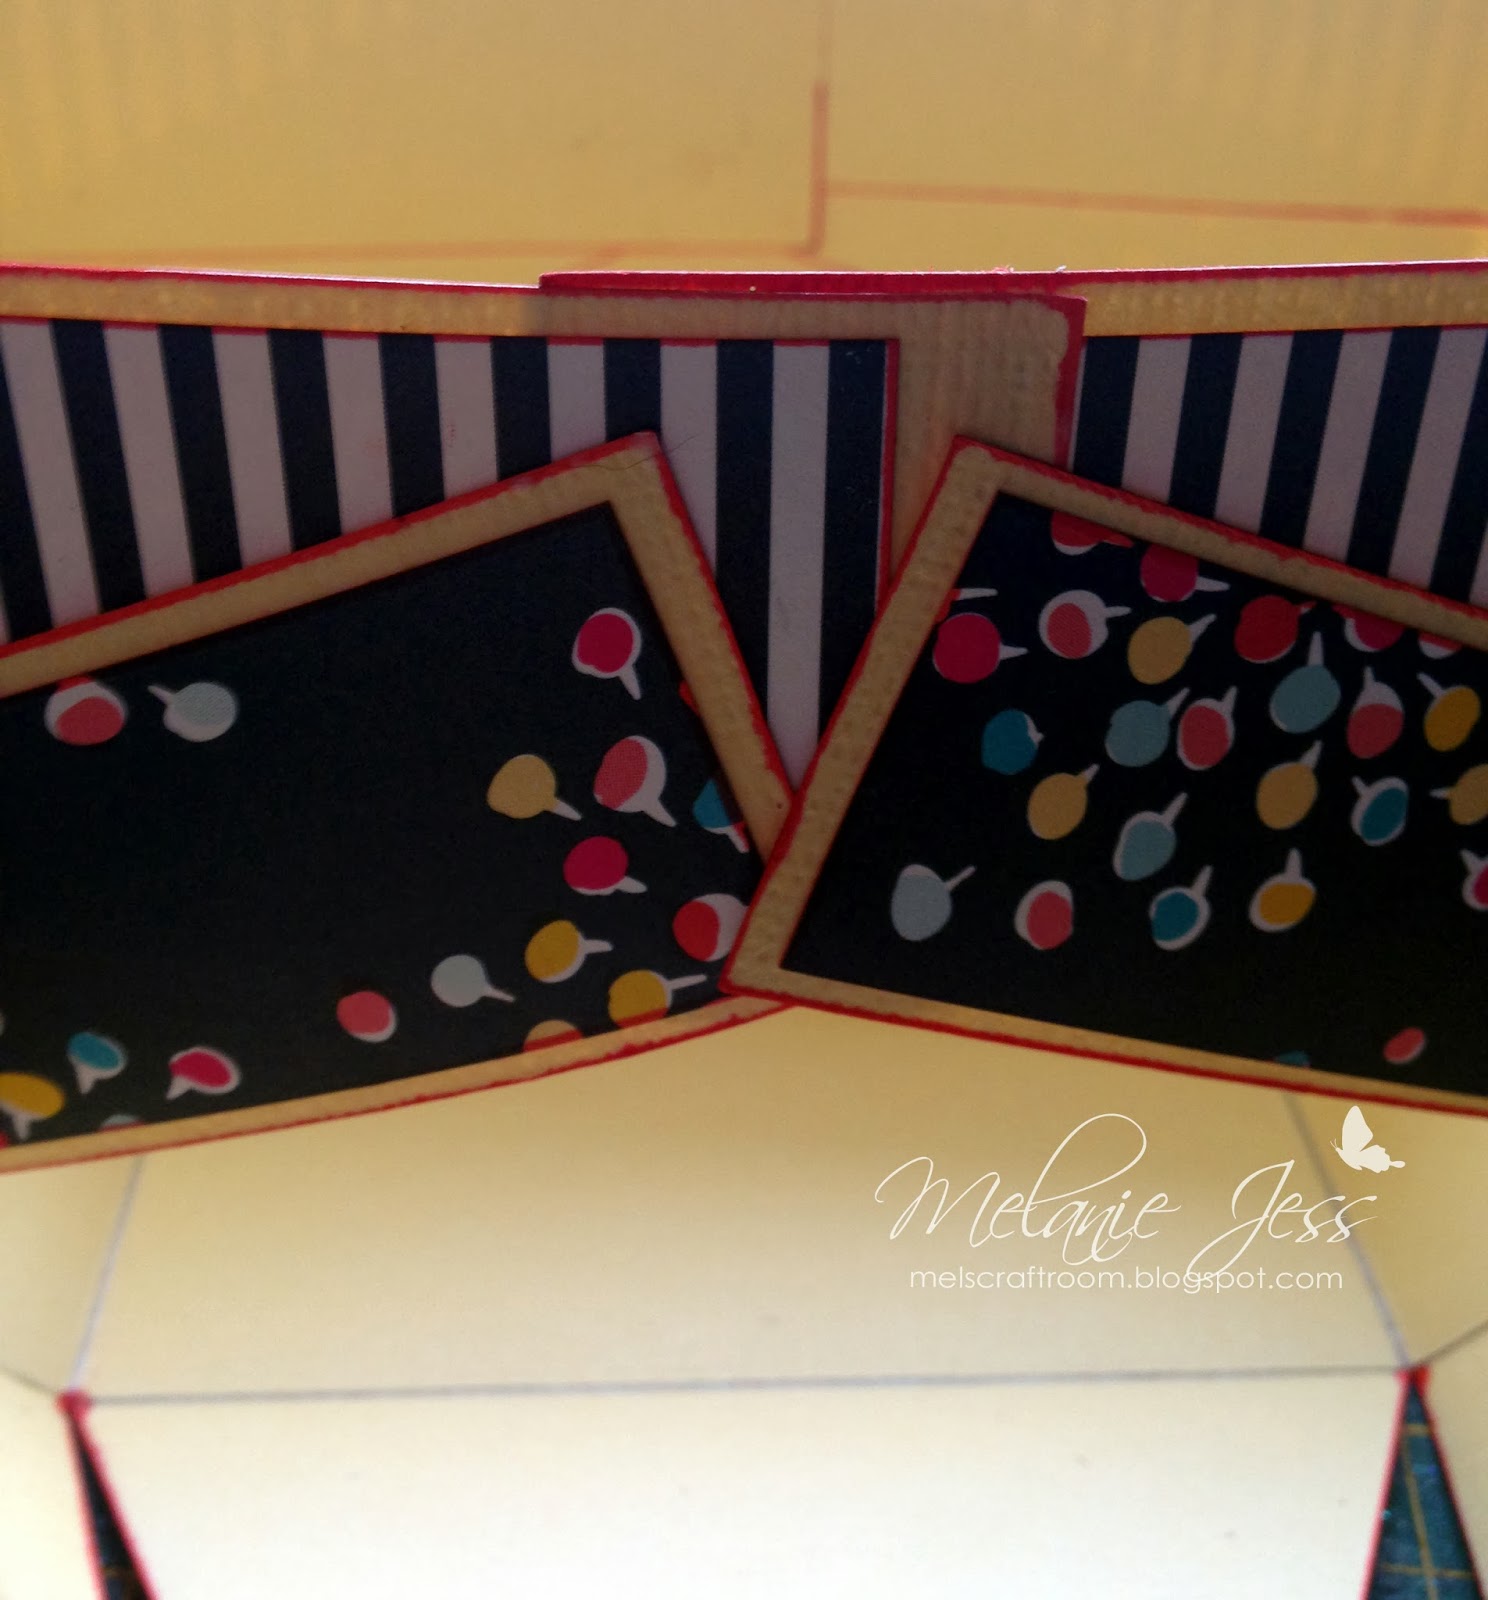
You want to stick the opposite tabs together, about an inch over lapping as you can see below


Then you want to stick the other panels together too, overlapping the first panels and each side


on all 3 panels


Next stick the triangle pendant up, you might need to hold this in place for the glue to stick or maybe use paper clips to hold in place while you work on the other side


I then stuck down the side panels, again edged with the alcohol marker


Then add a handle, 2 inches wide by 12 covered with more of the delish American Craft papers. I then added a birthday sentiment layered with spellbinders on matches papers with a few little paper roses to finish


Once finished add some tissue paper and some sweeties for that Special someone
I hope to find out if you all make a wee Basket for yourself
TTFN


        Clare Curd Crafts Die Cuts - Pom Pom Flower
    Spellbinders Nestabilities Lacey Circles     Spellbinders Nestabilities Standard Circles

Thursday, 29 August 2013

Versatility in products

Hello lovelies, well it's Thursday again, which means it's my turn to share.

With pennies not as free flowing as they once were  in our household, I know I like to get as much mileage from my crafting materials as possible, and one of the things I look for is versatility in the products. Take the Carta Bella - Well Travelled 6x6 paper pad, as soon as I saw it I liked it, and my first impression was how masculine it was, but after looking through it I discovered there are in fact some very useful papers in there.
I've previously used this paper collection and made a very manly card and a boyish mixed media hanging, but today I thought I'd show you just how versatile this paper pad really is.

The black and cream papers are from the Well travelled collection, and to contrast with these I wanted something totally different in both colour and pattern, so I took a plain piece of white copy paper and made a sheet of my own patterned paper using Dylusion sprays in Dirty Martini and London Blue, love these sprays so much, and I can see me using them A LOT!! I sprayed through a paper doily to get the lacy effect.


I stamped and cut out my main focal image, a very old stamp, in fact it's the very first rubber stamp I ever bought a good 10 years ago, and it's still a firm favourite of mine. I mounted this onto black card, as I did with all the other layers.

The flower is one I made from the sprayed paper, just cut a rough circle and then cut a spiral into it. Then from the outside edge of the spiral roll the strip all the way to the centre, then secure with adhesive. Roll some of the edges back to get some texture, then add a black gem to the centre of the flower. The frill is in fact a piece of the doily I sprayed through. 
Once everything was mounted up I stuck it to a 6x6 white card base.

~~~~~~
Just to show how versatile this paper pad really is I then went on to make a quick and simple Christmas gift tag

So crafting need not be expensive if you shop wisely and buy products that will see you through the whole year.

Monday, 19 August 2013

More Party Fun

Hello everyone
Mel here with my wee "party piece"


Just to let you know that Clare Curd Crafts has opened back up after a wee holiday, with more goodies than you could imagine! Best of all free delivery for over £35.00, same day delivery if ordered before 2pm and first time orders all get a wee "Welcome Gift"!!
If the freebie isn't enough to get you popping stuff in your basket, just check out whats NEW!


For the wee Blog Party I made this pretty little "Flower Tree"


Here's most of the material I used that you can find at Clare Curd Crafts and your crafty stash
Firstly I made the dowel into a point making it easier to insert into the polystyrene ball (please ask an adult to help with this bit), then using Tattered Rose and Vintage Photo Distress ink I sponge ink onto the ball to give a distressed look


Next I stamped out using the gorjuss Butterfly stamps, first in the Tattered Rose then Vintage Photo followed with the Embossing ink with some holographic powder from my stash


Now you could punch out flower shapes or maybe use a flower die like the stunning Memory Box Fabulous Phlox, but if you don't have either you can make your own roses with a simple circle. I used the Spellbinders Standard Circle for this one


Then cut it in a spiral leaving a large "circle " base shape to glue in the centre


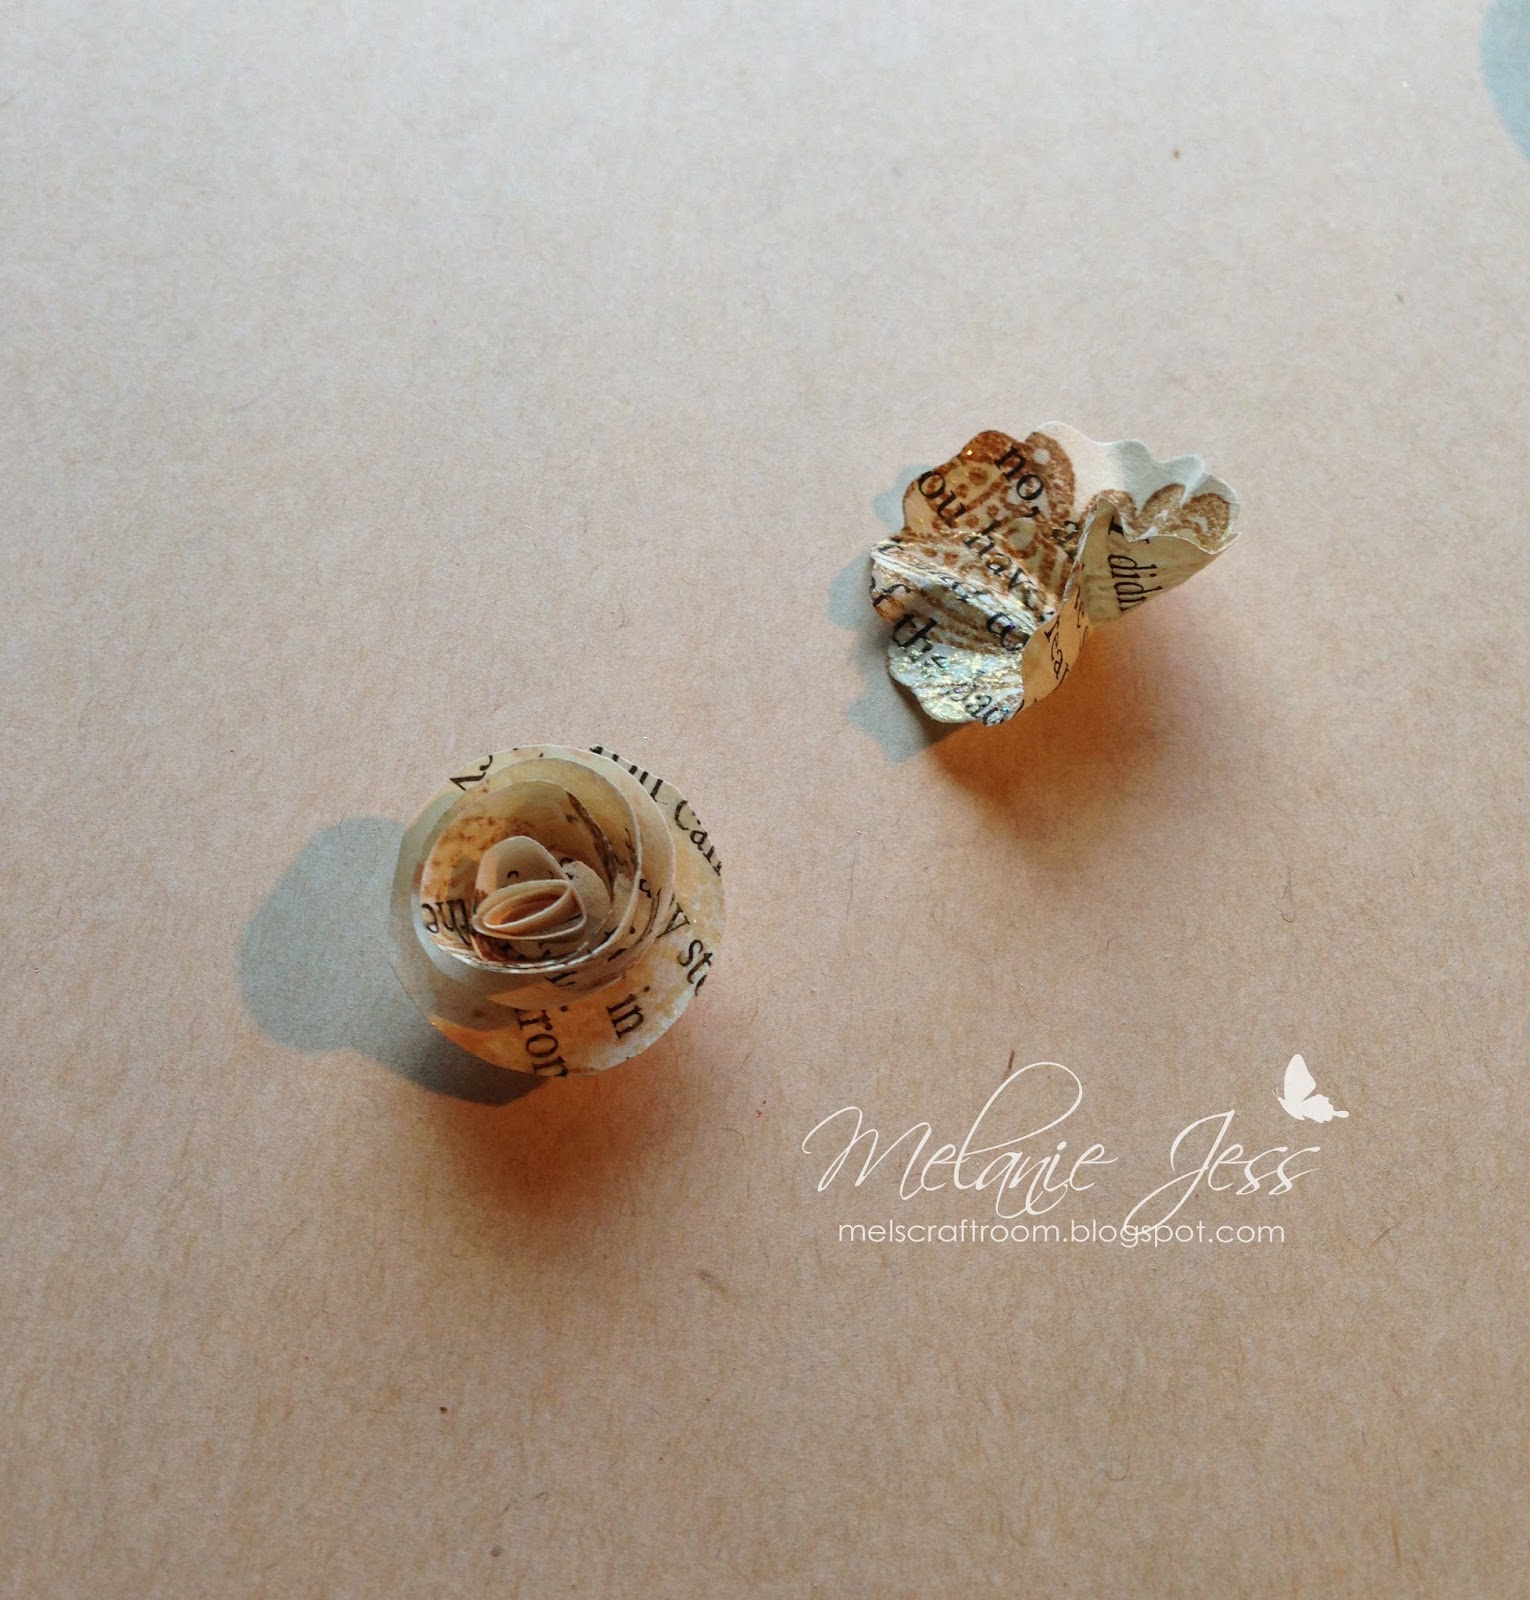
Then rolling from the edge into the centre with the pattern facing in, form your rose shape then with a dab of glue stick to "circle" base


As you can see above you can use the roses or scrunch up the flower for a nice effect, now you need to make plenty of these! I used over 100 punched petals on my 15cm polystyrene "Flower Tree"


Next I covered the dowel in some matching washi tape I had in my stash but you could use ribbon or even colour it with markers or stickers
Then insert into you ball using a wee bit of glue to keep it in place


Try making sure its at least 1/3 of the way in so it doesn't just fall back out


Next I started covering the ball with the flowers adding a dab of glue to keep them in place


next I took some pins, inserting the into the centre of all the flowers


Then I took the Stickles and covered the ball here and there to add more sparkle


Whilst the glitter was drying I stamped a single Butterfly using both inks again then embossed then cut it out as close to the edge as I could, then added gems for the body


Once it was all dry I stuck it in a wee plant pot I had lying around and added a wee ribbon to bring all the colours together


I hope you like my wee "Flower Tree" and it inspires you to make one of your own! Why not just add a ribbon instead of the dowel and have a few hanging around the house! My nephew says it looks like a huge Dandelion Flower

So close your eyes, make a wish and blow!

Remember and check out the other girls amazing creations during the Blog Party
Happy Crafting everyone