Showing posts with label Christmas. Show all posts

Saturday, 28 December 2013

Potted Poinsettia

Afternoon my lovelies

I do hope that you all had a great Christmas and that Santa was good to you? I was totally spoilt rotten and so was hubby too! Even with the "lurgie" we all had a fantastic time with the family!

Mel here with my wee post


I made this wee potted Poinsettia plant using my Silhouette Cameo and the delish Botanical Noel papers and alcohol markers! Everything else was in my stash!

They were very easy to make and made the perfect wee Christmas Gift!

Well off to catch up on some cleaning and ironing!
Have a great day everyone


Spectrum Noir 6 Pen Set - GREENSSpectrum Noir 6 Pen Set - REDS

Friday, 20 December 2013

Let it Snow

Good Morning

Ekkk not long now! If like me your still big kid at heart you'll be all excited that its nearly time for Santa to come! I'm all ready super hyper, my big brother gets home later today and literally can't wait too see him! Best Christmas gift ever hehe

Ok enough of my hyperness
This week at Clare Curd I created a wee last minute Christmas decoration using my trusty Cameo


Isn't it cute and perfect for one of those faux flicker candles or some sweeties for a lucky friend!


Firstly I opened the file up on my laptop and cut it out on the delish Recollections Botanical Noel papers and the other panels in some turquoise vellum from my stash


I then went round all the edges with a turquoise marker as you can see below. I feel it helps the Snowflakes stand out better


Next I stuck down the vellum on the inside of the holder making sure I added glue to the snowflakes so they wouldn't move about and get damaged. Below shows all the panels on. All that's left is to glue the tabs and stick it all together


above you can see I have added the handle using brads but you could always just stick it with glue 


Next I added gems and glitter to finish


Its a nice wee easy project and would be great with the kids! You could make lots and have them all hanging like a lantern bunting! A great wee Christmas project!

I hope you enjoyed my simple wee tutorial! You can find the lantern decoration file here if you want to have a try yourself!

Take care and all have a great weekend! I know I will


Recollections 12 x 12 paper Pad - BOTANICAL NOEL     Teresa Collins - Everyday Moments Brads      Spectrum Noir 6 Pen Set - TURQUOISES

Thursday, 19 December 2013

Simply does it

Oh my how close is Christmas now!! And if you are anything like me then you are rushing round trying to get everything bought, wrapped and delivered and there just isn't enough hours in the day, and then to find out you've missed out on making a couple of cards.....disaster. So with that in mind I thought I'd do a quick and simple, but stylish card this week for Clare Curd Crafts.
 
I used a circle card blank and cut a layer from another card blank, using a set of nesting dies and my good old Cuttlebug to give a bit of depth to the card.
 
I then stamped the quote from the Here Comes Santa stamp sheet, by IndigoBlu, and cut this out using  a smaller die.
 
I then took a sheet of card that I had covered in Mega flakes, both the Flakes and FlitterGlu are available here, and punched out a few snowflakes to embellish the card.
 
Add a single gem to the top snowflake and you are done.   


I think in total this card took maybe 10 minutes!
 
As I won't be posting again this side of Christmas I want to take this opportunity to wish you all a Happy peaceful Christmas


Friday, 13 December 2013

A wee Ruddy Nose

Morning all

How are we all doing this week?? Can't believe its almost here! Santa Claus will be here soon and he'll be bringing all those goodies for good boys and girls!

Today I wanted to share a wee quick Christmas card for my Clare Curd DT post


I'm sorry the picture isn't the best as my camera is dead and I can't find my Charger anywhere and the silly phone is rubbish for pictures at night!

As you can see all I have done is layered some Christmas scraps from the Botanical Noel paper pack with white card and added a lil cut out stamped image! The image is from the Crafty Impressions Happy Holidays A6 set all coloured with my alcohol markers


It only took me around 30 mins (I take forever to colour) from start to finish this little card, but you could colour loads of these images all stamped out in one go and then just add to cards. Then your all set with some last minute cards!

Will off to finish my Christmas wrapping
TTFN


Crafty Impressions A6 Stamp Set - HAPPY HOLIDAYS   Recollections 12 x 12 paper Pad - BOTANICAL NOEL    specnoir

Thursday, 12 December 2013

snowflake box

Hi everyone, I was a little stumped this week with what to make but that soon solved itself when I came across a lovely little box template whilst trawling Pintrest. The template for this box is available on Extreme Cards blog.
 
I started out printing off the template and because the card  I wanted to use was too thick for my printer I drew around the template.
 
I then carefully cut the pattern out.

 
Next step is to score along all the lines and fold them.

 
Now glue the sides together and stick the bottom onto the box. I also cut another piece to put inside the box to give me extra support on the base.


You should now be able to close your box and the lovely snowflake will appear.


Now to decorate! I used the pretty snowflake stamps from the Winter Critters set of stamps. I stamped them in Flitter Glu and then applied Mega Flakes in Royal Peacock
 
I then cut this piece into six small pieces to attach on the sides of the box.
I finally added a little glitter to the snowflakes and to the large snowflake on the top of the box.


Hope you like this little box, I think a few on the Christmas dinner table with after dinner mints in would be a nice touch.


Wednesday, 11 December 2013

Christmas with Clare Curd Crafts

Hiya craft friends,

Today is a quick tutorial on how I made this folded scallop card, using the gorgeous My Minds Eye Vintage Christmas 6x6 paper pad, also the coordinating 12x12 sticker sheet and red satin ribbon. All from Clare Curd Crafts


The slideshow below will show you step-by-step how I made the card


See you next Wednesday


Friday, 6 December 2013

Blue, Blue Christmas

Good Morning all

Well its Friday again and its Mel again but I'm here with something very new to me, so please be kind!


So I tried this new technique, if you find something wrong please be kind let me know!


Firstly I took a piece of super glossy card stock and cut it done to fit on my card


Next I covered it in Peacock Feathers and Broken China blue tones Distress Ink


I then used my heat tool to help dry of the ink ( be really careful with this and make sure the inks dry! I didn't do so well the first time heee)


Then taking my Embossing Ink and the snowflakes from the Crafty Impressions Happy Holidays set, I stamped all over to make my background


Then I covered the snowflakes in embossing powder the knocked off any extras


Heat all over with the heat tool again


I then took my black permanent ink pad and wiped it all over the surface, I did this a few times to get a nice even coat all over


then wipe over with a tissue to remove any excess ink from the embossed snowflakes


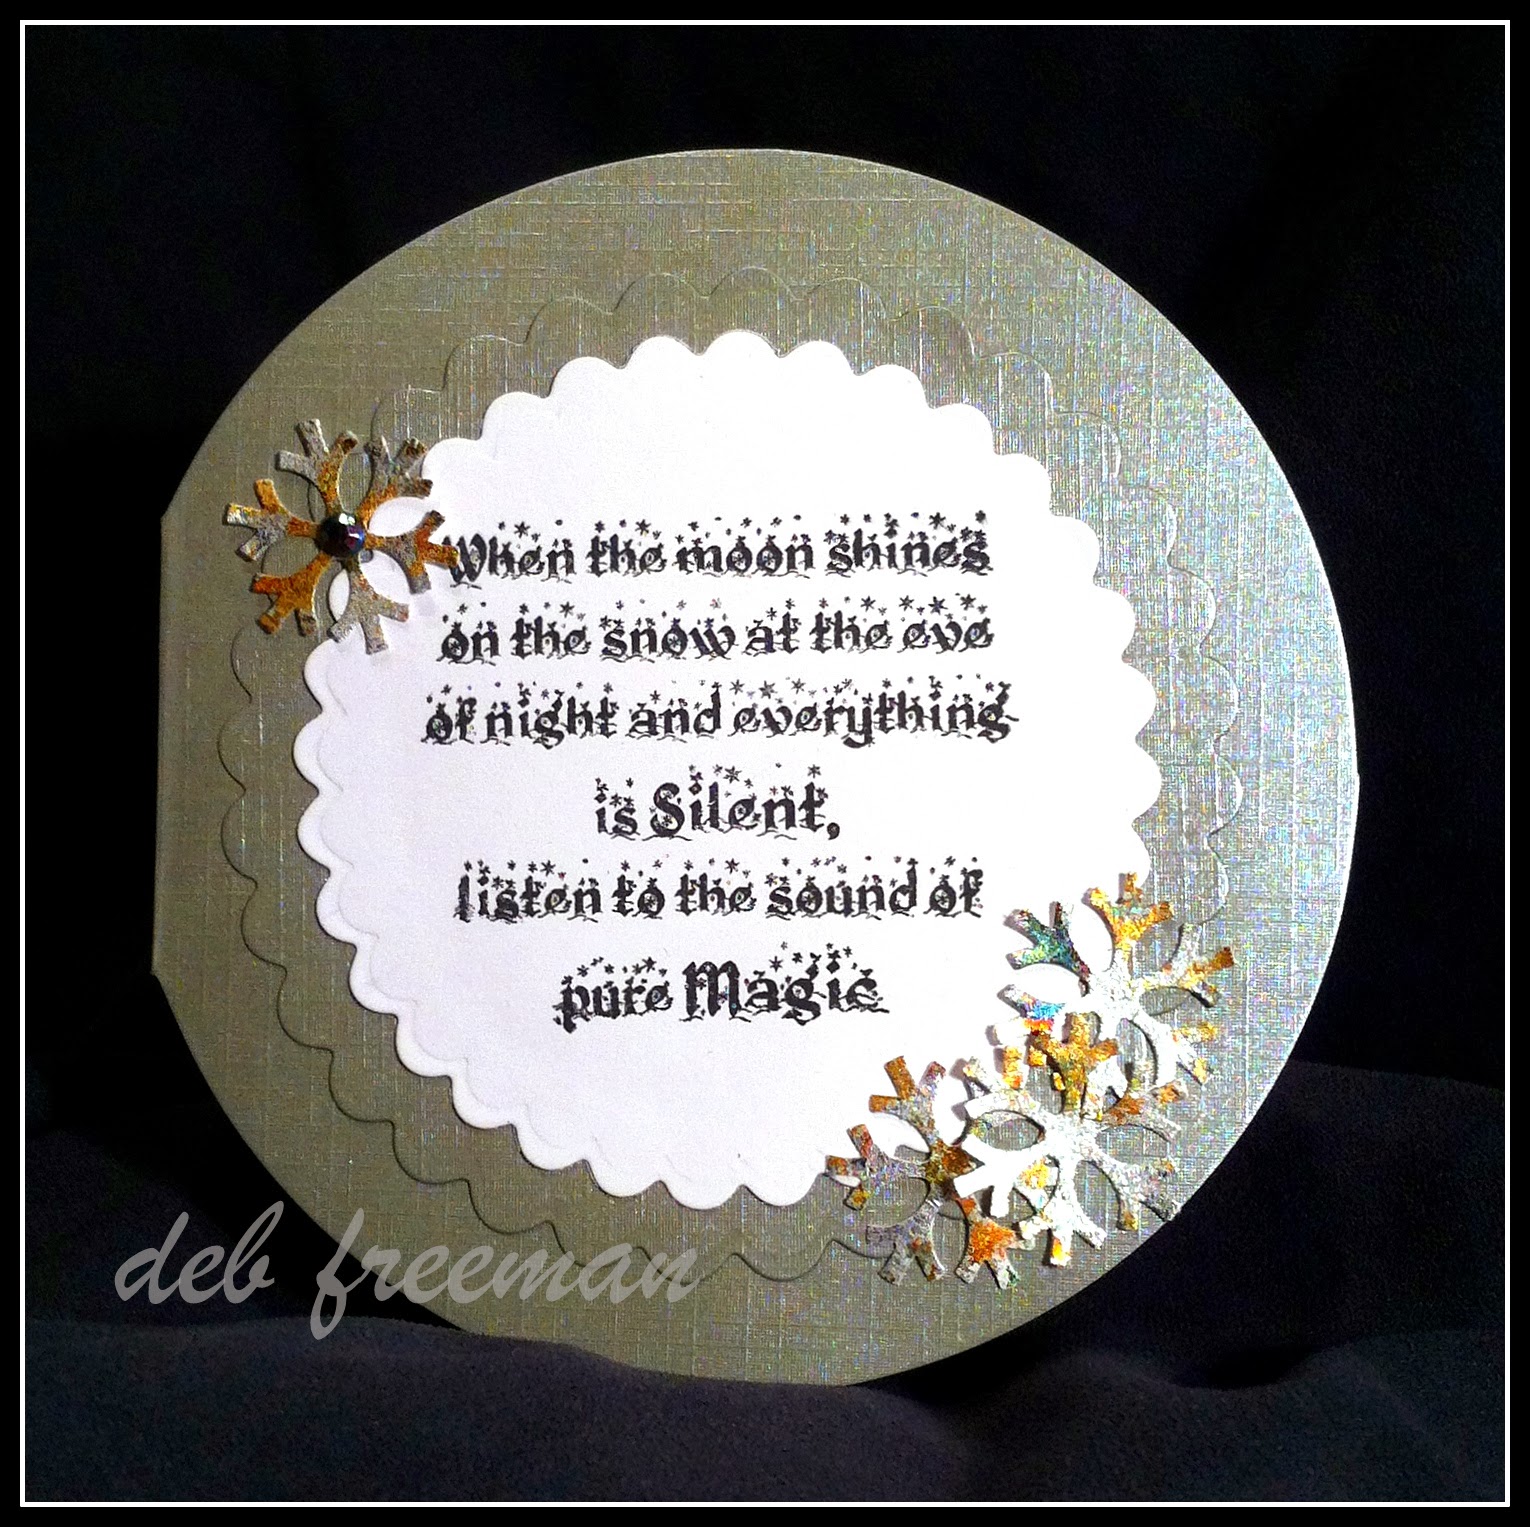
Next I layered the panel on to black card adding some ribbons before layering it on to a white card blank


I finished it off with the lil Time of Magic sentiment on another piece of white card that I inked again with the distress inks adding a black edge


I hope you like my little tutorial and sorry its not the greatest! But with practise I might get better heee

Well I'm decorating the tree today and baking some chocolate cupcakes for Craft Club tomorrow so all have a fab day!
TTFN


Tim Holtz DISTRESS INK PAD BROKEN CHINA Ranger  Tim Holtz DISTRESS INK Peacock Feathers Ranger
 Tim Holtz DISTRESS INK EMBOSSING Ranger  Crafty Impressions A6 Stamp Set - HAPPY HOLIDAYS     Lindsay Mason TINCHIES Stamp - A TIME OF MAGIC