Showing posts with label Indigo Blu. Show all posts

Thursday, 19 December 2013

Simply does it

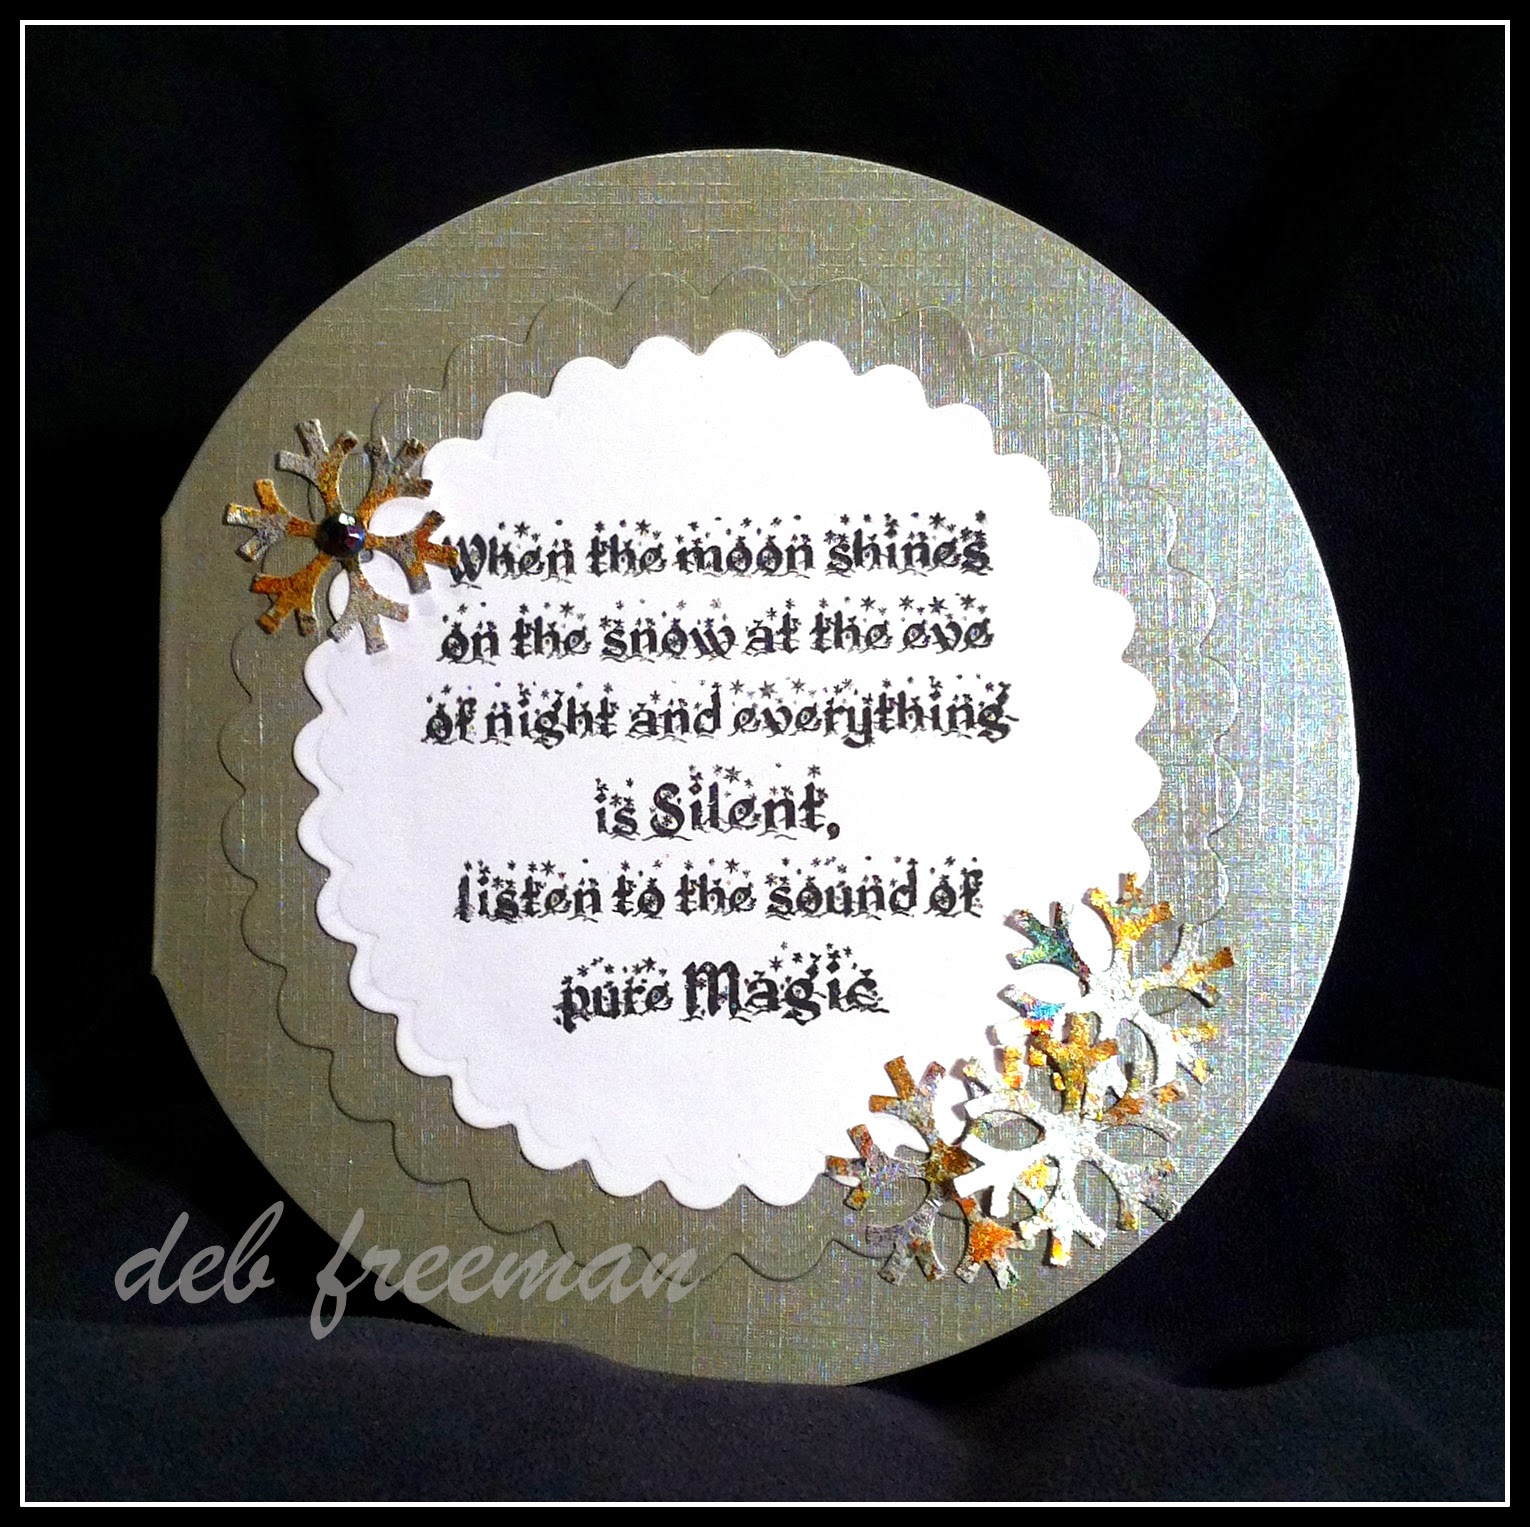
Oh my how close is Christmas now!! And if you are anything like me then you are rushing round trying to get everything bought, wrapped and delivered and there just isn't enough hours in the day, and then to find out you've missed out on making a couple of cards.....disaster. So with that in mind I thought I'd do a quick and simple, but stylish card this week for Clare Curd Crafts.
 
I used a circle card blank and cut a layer from another card blank, using a set of nesting dies and my good old Cuttlebug to give a bit of depth to the card.
 
I then stamped the quote from the Here Comes Santa stamp sheet, by IndigoBlu, and cut this out using  a smaller die.
 
I then took a sheet of card that I had covered in Mega flakes, both the Flakes and FlitterGlu are available here, and punched out a few snowflakes to embellish the card.
 
Add a single gem to the top snowflake and you are done.   


I think in total this card took maybe 10 minutes!
 
As I won't be posting again this side of Christmas I want to take this opportunity to wish you all a Happy peaceful Christmas


Thursday, 28 November 2013

Hello


Every time I see the John Lewis advert I get that warm, fuzzy, Christmas is coming feeling, and I think it's sort of inspired my piece for this weeks DT spot, only I've used a fox and a hare, no bears here.
 
 
I've used a 5x7 canvas board as my substrate, and applied layers of acrylic paints and sprays to get the desired background effect.
 
The trees and animals ( how cute are they) are from the Winter Critters set, by Crafty Impressions and the Santa and reindeers are from the Here comes Santa set, by IndigoBlu

 
If you are in the market for some new Christmas stamps, have a look over at Clares shop as she has some real beauties on sale.
 
~x~


Thursday, 14 November 2013

Cute Critters

As soon as I saw this set of stamps my first thought was 'awwwwww how sweet' my second was how versatile they were.
 
The little animals are really adorable and could be used for any occasion.
 
 
I stamped them in Stazon ink and then painted them in a pearlescent paint.

 
I then stamped the trees with Versamark ink and embossed them with black embossing powder. The animals were then mounted on 3D foam pads.
I then stamped the star with FlitterGlu and then applied IndigoBlu Mega Flake in Royal Peacock.
 
Before mounting the black square onto the base card I edged the basecard with flitterGlu and applied some more of the Mega Flake.
 

Items used :- Mega Flake
                  FlitterGlu
                   Phat Foam
                                         Winter Critters stamp set


Thursday, 31 October 2013

Inky Butterflies

Well good morning all

Its Friday already, can't believe what a fast week its been and not only that its the 1st of the month already! Can you believe its November??

Well its Mel again and this week I have been getting really messy and inky


As you can see I've been playing with my Distress Inks and some Dylusions Spray plus my fav IndigoBlu Wild Meadow Butterfly stamp

First I used my Distress inks in Peacock Feathers and Broken China to make my blue backgrounds then sprayed them with my Dylusions After Midnight Ink before spraying with my sparkle spray
Next I stamped my butterfly from the set using embossing ink and powder onto black paper, again spraying over with Dylusions and sparkle before cutting and layering my panels


You can see above I cut out a few of the butterflies in a black and also one in white with the Peacock Feathers ink before sticking to the card and adding a small sentiment from my stash, adding a small piece of ribbon to tie the colours altogether


I really enjoyed getting messy and playing with my sprays as the do get neglected while I play with papers and making 3D items lol! Tho the ink just doesn't wanna come off now 


Well till next time, keep crafting
TTFN


Dylusions After Midnight Ink Spray   Tim Holtz DISTRESS INK EMBOSSING Ranger   Tim Holtz DISTRESS INK PAD BROKEN CHINA Ranger      Tim Holtz DISTRESS INK Peacock Feathers Ranger  
    Clare Curd Crafts! Ravishing Ribbons - Double Sided Satin Turquoise 6mm

Wednesday, 11 September 2013

All about the layers

Hiya crafty friends,

It's that time of the week again for me to share with you my Clare Curd Crafts Design Team project.

My fingers definitely got very inky making this card. I used the combination of Spiced Marmalade, Dried Marigold and Mustard Seed Distress Inks to make the sunset sky, which I really love doing, in all it variations. Hmmmm...I can see a lot of inky experimenting ahead making different skies...keep your eyes peeled ;)

Memento Tuxedo Black was used to stamp the grasses to give a silhouette effect.


I added a sentiment, cutout of white card to match the card base.


Project ingredient:


Friday, 6 September 2013

Butterflies and Ink

Hello lovelies

Its Mel here again with another wee project using some of the delish products from Clare Curd Crafts, new products are being added daily!

This time I wanted to keep it simple (for me that is) and use just a view things that most people have in their stash without added to much to the card. 


The card was so easy to make, requiring only a few crafty stash items
I used the utterly stunning Wild Meadow set from Indigo Blu and inked up wit the Walnut Stain Distress ink making my wee scene. Then I took the ink again and distressed the edges of all 3 layers on the card, including some kraft paper


The butterfly I stamped onto white card then cut out, stuck on to kraft paper before inking the edges and sticking to the card base


then to finish off the card I added some satin ribbon from my stash, Craftwork Card Candi and added stickles to the butterfly and dandelion puffs


I wanted to create something without using my most fav craft item of patterned paper and I think I might have just achieved it. What do you think??


products used


Wednesday, 28 August 2013

Watercolour Stamping

Hiya crafty friends,

Welcome to my Clare Curds Crafts DT day. I can't believe it's my third project already!

This weeks project was was a bit of an experiment for me. I didn't have a clue if it would all work out in the end. Thankfully, it did :)

This month I have shared three different projects using just one stamp set, the Indogo Blu - Wild Meadow set and some Tim Holtz Distress Inks.

Today, I am sharing how to do Watercolour stamping. A very simple but effective technique.

Step 1.
First I took the grasses stamp from the collection and placed it on a large stamping block.


Step 2.
I used Shabby Shutter, Peeled Paint, Tattered Rose and Victorian Velvet, in the following way.

I applied the Shabby Shutter on the majority of the stamp, particulary where the stems , grasses and fern are.

Taking the Peeled Paint ink, I applied this to the bottom of the stamp and very slightly up the sides

Tattered Rose ink was then applied to the top of the stamp, particularly where the flowers are.

 Then finally I added a small amount of Victorian Velvet to the very top of the stamp.

Step 3.
I lightly spritz the stamp with some water (hold the spritzer further away from the stamp than shown in the picture, as it will make it too wet).

I tested how the stamp would come out on a piece of copy paper first, to see if I liked the colours together etc.I also realised I used too much water. So I knew to use less next time.

Step 4. 
After re-inking the stamp as above, as I like the effect, I stamped on to some hexagon cut outs

Step5. 
 For the sentiment, I repeated the same technique using the inks in the following order


 Then I stamped it on to the remaining hexagons I had cut out.

Step 6.
 I made a hexagon background, using the same size hexagons. But I set the cut as a perforation, rather than a solid line.

Step 7.
Taking the corresponding stamped hexagons, I began to stick them to my background. Some raised with foam pads and some glued flat.

 Step 8.
I should have done this before I stuck on the stamped hexagons, but I only thought of it afterward...lol.I gave the background a wash of Broken China Distress ink mixed with water. Which allowed the stamped hexagons to stand out more.

Step 9.
I cut and piece of  dusky blue card 16.2cm x 16.2cm and adhere the hexagon sheet to the centre of it.


Step 10.
I then adhere it to and 8 x 8 scalloped card, using two layers of foam tape


Step 11.
Using Cystal Effects, I added a bit of dimension to the flowers


Step 12.
I felt the card needed just a little extra, so I made a layered butterfly using the stamp from the set.
I used the same inking technique as I used earlier and stamped two, without re-inking after the first. So I had a lighter version too.

Layer the two butterflies together, the lighter of the two at the bottom, by just applying adhesive to the centre, so the wings of the top butterfly can be raised slightly. I then placed it in the top left corner of the card


See you next Wednesday!

Project ingredient (available from Clare Curd Crafts):