Showing posts with label tim holtz. Show all posts

Wednesday, 13 November 2013

Silent Night

Welcome to Clare Curds Craft blog!


I really love Christmas crafting, so was really excited when I received my design team goodies from the wonderful Clare Curd Crafts. And I knew exactly what I wanted to do with the Winter Silhouettes stamp set.


I am always inspired by anything the incredibly talent Barbara Grey does, so here is my little homage to her using this stamp set, Broken China Distress Ink and Memento Tuxedo black ink.

Firstly I masked off the edged of the card and placed a ripped piece of paper along the bottom third so I could form some hills.

Taking the Distress Ink I applied from the outer edge inwards

Once the paper is removed, you have the appearance of snow covered hills.

To add dimension, I rotated the ripped paper and added  some snow drifts by sponging very gently downward across the edge of the paper.

I lined up the paper again with the hills I had just formed and then stamped over the edged of it with the village scene using black ink. I repeated again to add house
 

Removing the outer masking tape left a clean boarder framing the image

I took one of the sentiments from the stamp set, which I stamped over the edge of the image in the bottom right hand corner,

 Taking a black fine line pen I added a slightly waving line around all the edged of the image.

And hey-presto the finished image :)

Thanks for popping by, and I will see you again next Wednesday with another Clare Curd Crafts project...see you then.


Thursday, 31 October 2013

Something for the boys

It's Thursday so it's my turn to share a little inspiration today and yes I know it's Halloween but I just couldn't bring myself to make anything spooky, so instead I went all butch and masculine and made a grungy card.
 
the base of the card is coloured using a brayer and a brown ink pad.
The layers are cut from the Carte bella paper pack as well as some old Tim Holtz papers from my own stash.
 
Clare stocks a great selection of Tim Holtz products by the way!
 
 
I then started working on my layers, some inking, some distressing and some stamping

 
The motorbike stamp is great and is  from  the Crafty Impressions Explore stamp set

 
I put half the quote on the outside of the card

 
And then stamped the rest inside


see you next week


Thursday, 3 October 2013

Have a go

It's Thursday, so it's me Deb to share a little something with you today.

Do you ever see something on your travels around the internet and think 'Oooooo I'd love to have a go at that' ? I know I often do. I first saw mixed  media cuffs a year or so back and immediately fell in love with them and have since then been wanting to have go at making my own.
 
Now those of you who do mixed media know it isn't the cleanest of hobbies and I often have stained fingers, as was the case after making this project, so please excuse my grubby looking nails and fingers in these photos.


I started out with a cutting a length of grunge board that fitted around my wrist and I coated it in gesso then started adding colour, a mixture of alcohol inks and Dylusion sprays.
 
I then added a length of ribbon along the cuff using a good glue.
 
 
The quote is a stamp from the Crafty Impressions Explore set. I stamped this onto a thin piece of metal using Stazon ink and attached this to the cuff using eyelets.
 
The next step was to add the edging ribbons to the cuff. This was done using hot glue.
 
I also added a few flowers to the cuff, just to pretty it up a little, but you could add charms, buttons, anything would look good.
 
 
Finally I added some more eyelets at the back to thread ribbon through to allow the cuff to fastened


I do hope you've enjoyed this little project as I had a lot of fun making it and think I may make a few more.
 
 
There are some great tutorials on Youtube on how to make cuffs if you fancy having a go yourself.
 
See you next week


Monday, 19 August 2013

More Party Fun

Hello everyone
Mel here with my wee "party piece"


Just to let you know that Clare Curd Crafts has opened back up after a wee holiday, with more goodies than you could imagine! Best of all free delivery for over £35.00, same day delivery if ordered before 2pm and first time orders all get a wee "Welcome Gift"!!
If the freebie isn't enough to get you popping stuff in your basket, just check out whats NEW!


For the wee Blog Party I made this pretty little "Flower Tree"


Here's most of the material I used that you can find at Clare Curd Crafts and your crafty stash
Firstly I made the dowel into a point making it easier to insert into the polystyrene ball (please ask an adult to help with this bit), then using Tattered Rose and Vintage Photo Distress ink I sponge ink onto the ball to give a distressed look


Next I stamped out using the gorjuss Butterfly stamps, first in the Tattered Rose then Vintage Photo followed with the Embossing ink with some holographic powder from my stash


Now you could punch out flower shapes or maybe use a flower die like the stunning Memory Box Fabulous Phlox, but if you don't have either you can make your own roses with a simple circle. I used the Spellbinders Standard Circle for this one


Then cut it in a spiral leaving a large "circle " base shape to glue in the centre


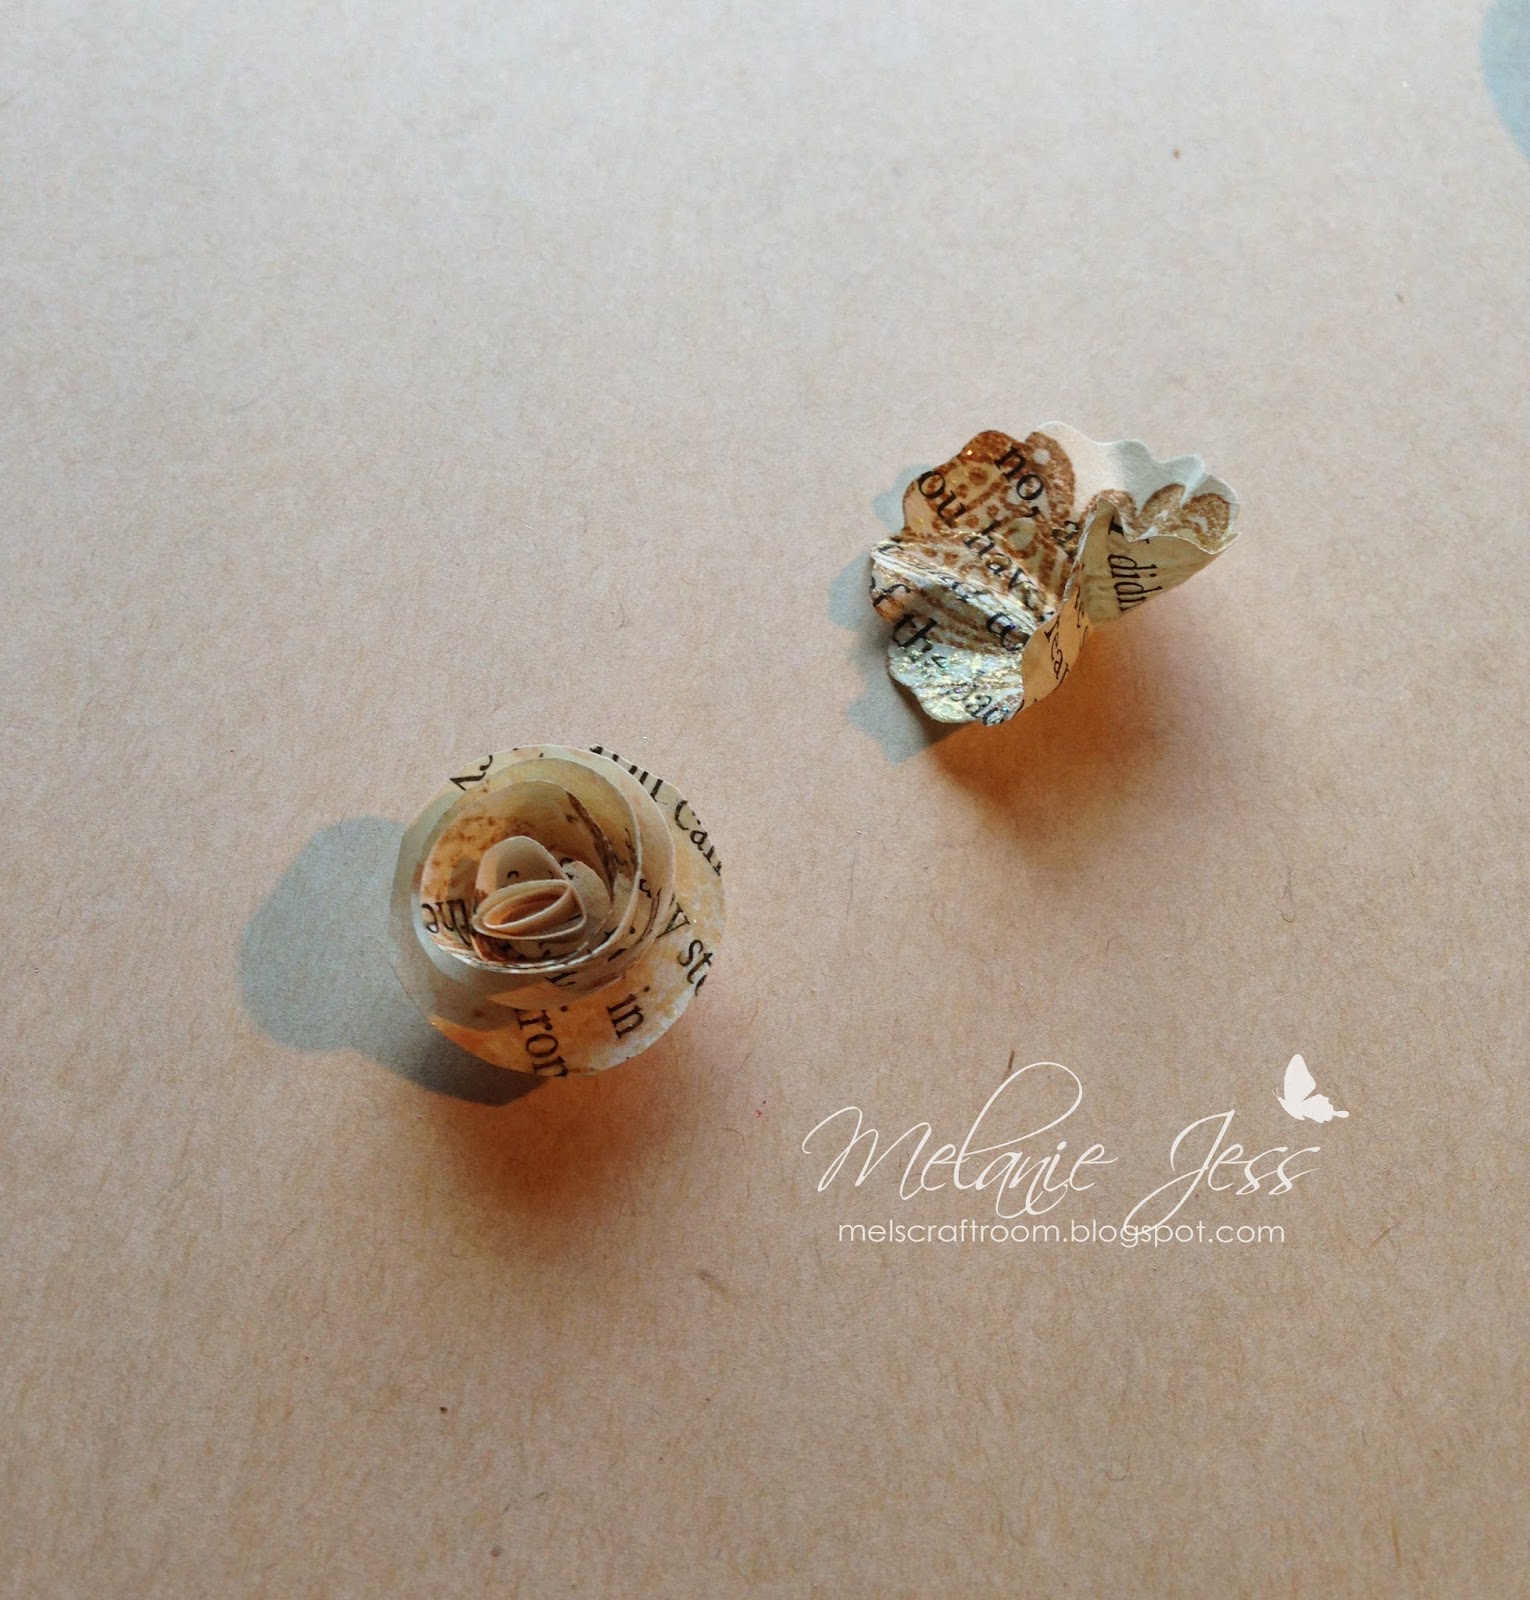
Then rolling from the edge into the centre with the pattern facing in, form your rose shape then with a dab of glue stick to "circle" base


As you can see above you can use the roses or scrunch up the flower for a nice effect, now you need to make plenty of these! I used over 100 punched petals on my 15cm polystyrene "Flower Tree"


Next I covered the dowel in some matching washi tape I had in my stash but you could use ribbon or even colour it with markers or stickers
Then insert into you ball using a wee bit of glue to keep it in place


Try making sure its at least 1/3 of the way in so it doesn't just fall back out


Next I started covering the ball with the flowers adding a dab of glue to keep them in place


next I took some pins, inserting the into the centre of all the flowers


Then I took the Stickles and covered the ball here and there to add more sparkle


Whilst the glitter was drying I stamped a single Butterfly using both inks again then embossed then cut it out as close to the edge as I could, then added gems for the body


Once it was all dry I stuck it in a wee plant pot I had lying around and added a wee ribbon to bring all the colours together


I hope you like my wee "Flower Tree" and it inspires you to make one of your own! Why not just add a ribbon instead of the dowel and have a few hanging around the house! My nephew says it looks like a huge Dandelion Flower

So close your eyes, make a wish and blow!

Remember and check out the other girls amazing creations during the Blog Party
Happy Crafting everyone